Burlington standard close-coupled pan with slimline lever cistern

Bathroom remodel just completed in Clapham


We have just completed a full bathroom remodel project in Clapham.  The case looked hopeless.  What could we do with this small damp bathroom in a tiny side return?  Three weeks later it is transformed into a bathroom that cheers your morning and makes a relaxing evening soak a pleasure.

Chevron tiles from smoke and fire

Chevron wall tiling

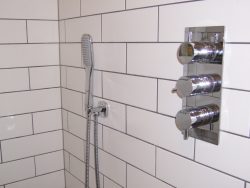
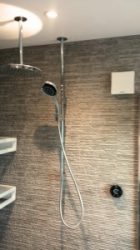
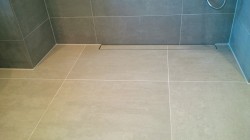
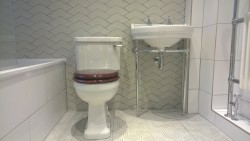
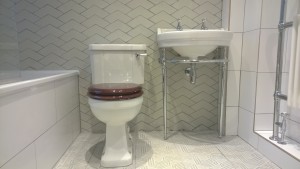
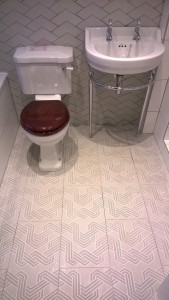
The chevron tiling on the rear wall, using beautiful hand made tiles from Smoke and Fireare a really eye catching feature.  They work well with the 'funkycarpet' floor tiles from Worlds End Tiles.   The rest of the room is half wall tiled in a white, large format, industrial tile.  This draws the eye to the chevron tiling on the feature wall and the stunning Burlington fittings.

'Funky Carpet' tiles
'Funky carpet' tiles from Worlds End Tiles

Burlington fittings

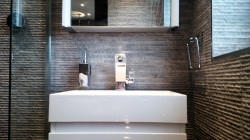
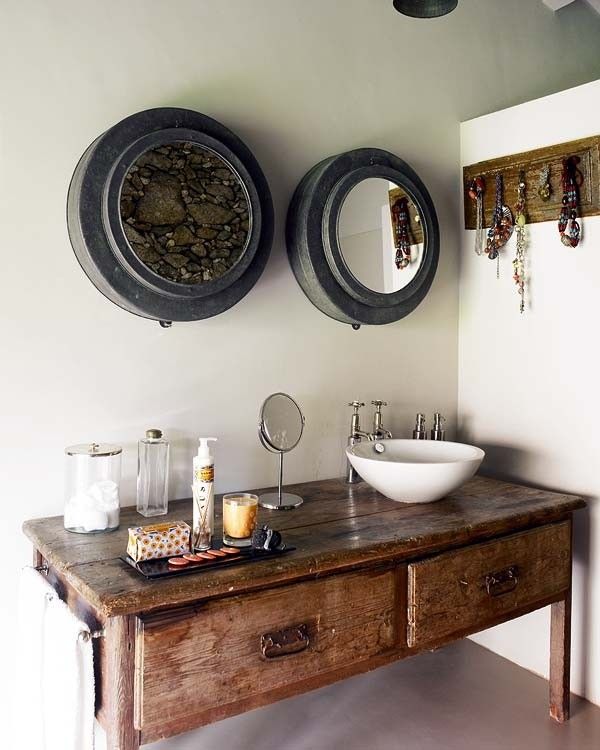
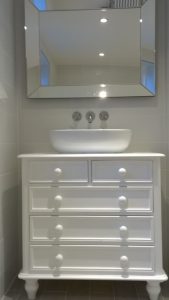
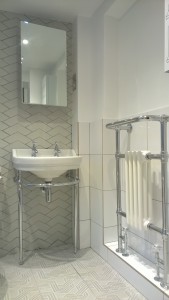
The basin is an Edwardian round 56cm basin and basin stand from Burlington Bathrooms combined with a Regal close-coupled pan with slimline lever cistern. The Burlington product range against the backdrop of the chevron tiling give this bathroom remodel a traditional feel.

The Burlington range is a great combination of traditional style and modern technology.  The lever flush is actually a dual control.  If you push it upwards it releases a small flush and downwards for the full.

The traditional style Burlington towel heaters are more practical than the basic design of modern ones.  Rather than trying to stuff towels into the small gaps between bars these towel heaters have a more user friendly rail.  To add to the warmth of this previously cold, damp room we installed warm-up underfloor heating.  This is a great feature in a ground floor bathroom with a concrete sub-floor.  Without it tiles laid directly on to the concrete can be icy cold in the morning.

Bathroom remodel clapham
Bloomsbury radiator with angled valves

Bathroom remodel

For more pictures of this stunning bathroom remodel visit my gallery on London Bathrooms website.

Stratum from Topps Tiles


Porcelain tiles are ideal for bathrooms.  They are long lasting and hard wearing and come in a huge range of styles and textrures.  One of my tilers has just completed a wetroom using the new Stratum tiles from Topps Tiles.  The effect created by these textured porcelain tiles is stunning.  They come in a large format - 300 X 600mm but give the look of a stone mosaic.

Strata by Topps Tiles


You do need an experienced tiler to install these and even then it can be tricky.  The greatest challenge is the grouting - because of the surface of the tile.  The tiles are so rough the grout gets stuck on the face of the tile as you try to wash it off.  In the end we had to use a grout remover on the tiles to get them clean.

I would suggest using a pointing/grouting gun on these and minimising excess grout as much as possible.  Then go over it dry and remove excess before washing  the joints carefully with a damp sponge.

Porcelain tiles floor tiles

Porcelain is the strongest and most durable tile type available.  It's availibility in so many different formats and finishes make it ideal for a bathroom project.  The tile patterns and textures can so closely mimic stone it is sometimes impossible to tell the difference.  You will notice the time saved on cleaning and maintaining them though.  Porcelain tiles are so durable you will find that they need no maintenance and will last forever.  Natural stone by comparrison needs resealing regularly and can easily become marked or stained.
Picture of a recessed thermostatic shower valve wth three handles.

Repairing a thermostatic shower valve

Repairing a shower valve seems to be becoming a very common task.  I was asked to repair this bath store thermostatic shower valve today. The valve was about 8 years old and had stopped delivering hot water. At the maximum hot setting the delivered water was Lukewarm at best.

Bathstore shower valve
The common cause of this problem is either:

a. The hot inlet filter is blocked
b. the thermostat in the valve is faulty.

The best thing to do is make sure it isn't problem a. before you try to order a new thermostat.
This valve didn't have an instruction manual but most are fairly easy to do without. If you can see a brand on the valve it is worth going on the manufacturer website to download the manual before you start taking it apart.

Repairing a shower valve:

When repairing a showoer valve the first thing to do is remove the handles. With most of them  you need a small allen key. Then remove the face plate. It will have silicon behind it so slide a knife blade behind and cut around if you can't pull it of easily.

Removing the handle reveals a philips screw. There are 2 washers. Be careful not to drop them in the wall cavity as you remove the screw.

The final chrome part of the handle can be unscrewed in an anti clock wise direction.
You will now see two access covers to the hot and cold filters. To open these remove the central screw and then turn anticlock wise. I did this using a pair of long nose pliers. I put the points into the two holes and turned.

Internal or bathstore thermostatic shower valve
Use the long nose pliers to pull out the internal parts and filter. Remember how they come out. They will need to go back in the same way.

You can then flush this by turning the water back on for about 5 seconds while holding a bucket in front of the valve.  Reassemble the valve and test. If this hasn't worked you will need to try to track down a new thermostat. I was lucky. Although there was no obvious debris in the valve this seemed to fix the one I worked on.

When you put the handle back on the thermostat you will need to readjust the maximum and minimum temperature delivered. You do this by turning the central spindle while the handle is of. Left for hotter and right for colder.

Mira Digital shower

We fitted this Mira digital shower in a wetroom.  I really like it.  It looks amazing and the functionality is superb.

Mira digital electric shower

This is the Mira Platinum Dual Ceiling Fed - Pumped.  It is for a low pressure system (this means the water for the system is supplied from a tank of water in your loft).  I found it the ideal shower for this installation for three reasons:

1.  The bathroom was on the first floor and with an empty loft space above.  We could install the pump and mixer unit and all of the plumbing in the loft above.  The mixed water feeds come down through the ceiling from above.  You don't have to chase any pipework or electric cable into the walls behind the tiles.  The control is wireless.

2.  It is unusual for digital showers to have a fixed head and two separate outlets.  This one does and not only that the handheld shower has four different functions you can use by turning the head.

3.  It is really easy to install and set up.  Once plumbed in you just switch on the control get it to register the pump and then just turn it on.  It even runs for up to 15 mins completely dry without damage so if you do make a plumbing mistake initially you aren't going to damage the pump due to your mistake.

The Mira digital shower gets my recommendation:

I will be recommending these showers in future.  There is a  version for high pressure systems as well.  They are available for fitting into different locations if you aren't lucky enought to have empty loft space above.  There is a version for most situations.  You will be able to install the digital wireless controls for showers and the mixer where they can be easily accessed in the bathroom.  This is the future of mixer showers.  The biggest problem with the traditional valves is that the plumbing and valve itself is buried in the wall behind the tiles so can be really difficult to access for maintenance.

Reclaimed furniture in a bathroom


A reclaimed bathroom vanity unit can add warmth and character to any bathroom.  The use of reclaimed desks and drawer units in bathrooms is a great idea. With all of the tiling and white porcelain bathrooms can look rather cold and clinical.  An old piece of furniture used like the one below to mount a counter top wash basin and taps can add a much needed warm lived in feel to a bathroom.

Admittedly this one works better in a larger well lit bathroom.

I love the use of old furniture as a basin unit. Putting a simple ceramic bowl and mixer tap onto an old wooden unit like this is stunning and practical.

This picture is from freshome.com in Portugal.

Reclaimed bathroom vanity unit

The vanity unit below looks great in this small wet room installation.  It was a rather battered pine set of drawers that we painted with a slightly distressed look.  Combined with the countertop basin and the wall mounted tap it worked really well.  We fixed the top two drawers in place to conceal the waste plumbing.  The bottom three drawers are fully functioning.

This old chest of drawers makes a beautiful and practicle vanity unit.

You can use most furniture pieces but it is better to use something old that has stood the test of time.  New wood can shrink and twist in the warm damp environment of a bathroom.  The downside is that it will need some maintenance to keep it looking good.  The benefit is a great looking practicle vanity unit that doesn't cost the earth - made of solid timber.

Wetroom with a linear trap


We finished this wetroom with a linear drain with a large 600 X 600 format tile.  The wetroom linear drain has a tiled cover so that it blends perfectly into the floor.

Wetroom floor with large format tiles and linear floor gully.

We used the schluter systems - Schlüter-KERDI-LINE-H /-V to tank and form the floor of the wetroom.  The nice thing about this wetroom floor former is that the gully goes tight against the wall and you can tile on top of the gully to give the floor a really neat finish.  The gap to take the waste water is just a little wider than a normal grout joint.

The trap is easy to access and clean.  Schluter provide a key to lift the top off and even a brush with which to clean the gully.

Tiling a wetroom linear drain

The tiling takes a little extra time to layout to get the correct fall across the entire floor.  We needed to do a couple of extra tile cuts but far less that you would have had to do if you had a standard square trap in the middle of the shower area.

From this fitting experience I would recommend the linear trap to anybody who is intending to use large format tiles for a wetroom floor.

Fixed head and handheld with dual valve